Upper Section
OVERVIEW:
This section provides instructions for customizing the upper section of client statements. Specifically, it deals with the positioning of the return and mailing addresses to aid in the use of windowed envelopes.
HOW TO GET THERE:
1) At the Main screen.
2) Select the 'Setup' menu at the top of the screen and scroll down to 'Statement'.
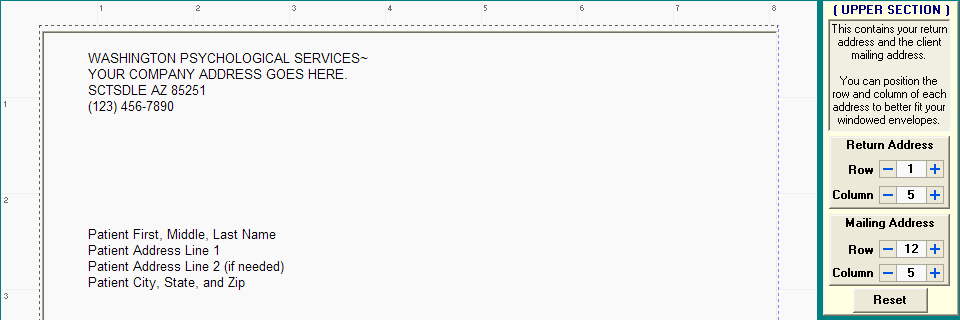
3) The 'Design your own Statement' screen will be displayed. The image displayed below is the upper section only. Details on the middle section and lower section can be found in their appropriate sections.
INSTRUCTIONS:
The upper section contains your return address and the client mailing address. You can position the row and column of each to better fit your windowed envelopes.
Return Address Row - This specifies the number of rows from the top of the page that the return address begins printing. Clicking the "+" (plus) sign will move the return address lower on the page one row at a time, while clicking "-" (minus) will move the return address higher on the page one row at a time. NOTE: If you would like the return address to not appear on the statement at all, select a row of "-1" (negative one) and the return address will disappear from the statement. This is useful if you have pre printed letterhead with your return address information already appearing on your pre printed letterhead.
Return Address Column - This specifies the number of columns from the left side of the page that the return address will begin printing. Clicking the "+" (plus) sign will move the return address to the right one column at a time, while clicking "-" (minus) will move the return address to the left one column at a time.
Mailing Address Row - This specifies the number of rows from the top of the page that the client mailing address will begin printing. Clicking the "+" (plus) sign will move the client mailing address lower on the page one row at a time, while clicking "-" (minus) will move the client mailing address higher on the page one row at a time.
Mailing Address Column - This specifies the number of columns from the left side of the page that the client mailing address begins printing. Clicking the "+" (plus) sign will move the client mailing address to the right one column at a time, while clicking "-" (minus) will move the client mailing address to the left one column at a time.
Reset - In the event that you get confused on the positioning of the addresses, or you cause them to overlap and are not able to return them to their original positions, you can click on this button to return both addresses to their default positions.
NOTES:
The text that is displayed for the return and client address in the upper section is for display purposes only. You cannot edit this information on this screen as it is automatically inserted into the statement at the position you define. The return address is retrieved from the Company Setup screen under the Setup Menu, while the client address is retrieved from the Client Information screen. The Client Information screen also offers an Alternate Address located in the Client Accounting tab if the mailing address for this client is different from the client (parent, guardian, agency, etc).
If you have pre printed letterhead with your return address information already printed on it, you can eliminate the printing of the return address by selecting a return address row of "-1" (minus one).
The upper section of the statement does not offer any additional features. If you would like to place additional information about the practice, client, etc., on your statement you will have to place that information in the lower section of the statement.
| Browser Based Help. Published by chm2web software. |